Tuesday 16 December 2014

Hockney's Joiner Images

Earlier today I went into town to practice shooting some Joiner style images. Here are the results...i think they worked out quite well for a first try. I do like the tree one more than the ran as i think the ram looks a lot more abstract style than the tree.


Tuesday 9 December 2014

Time

During the course of this project I feel I have developed many skills and learnt some new things along the way. The artists I researched for this project especially, helped me to gain a lot of ideas and inspiration for this project and I especially liked going out and experimenting with different styles and also different cameras. Before this project I hadn’t really used film at all, during the project I got to develop my own film and then create prints from the negatives which I found really interesting.
During the project we also experimented with multiple exposures which again, I hadn’t really done before and I think this was a good skill to learn as I think the outcomes look effective and I really liked the style of the studio image I created using a 5x4 monorail camera.
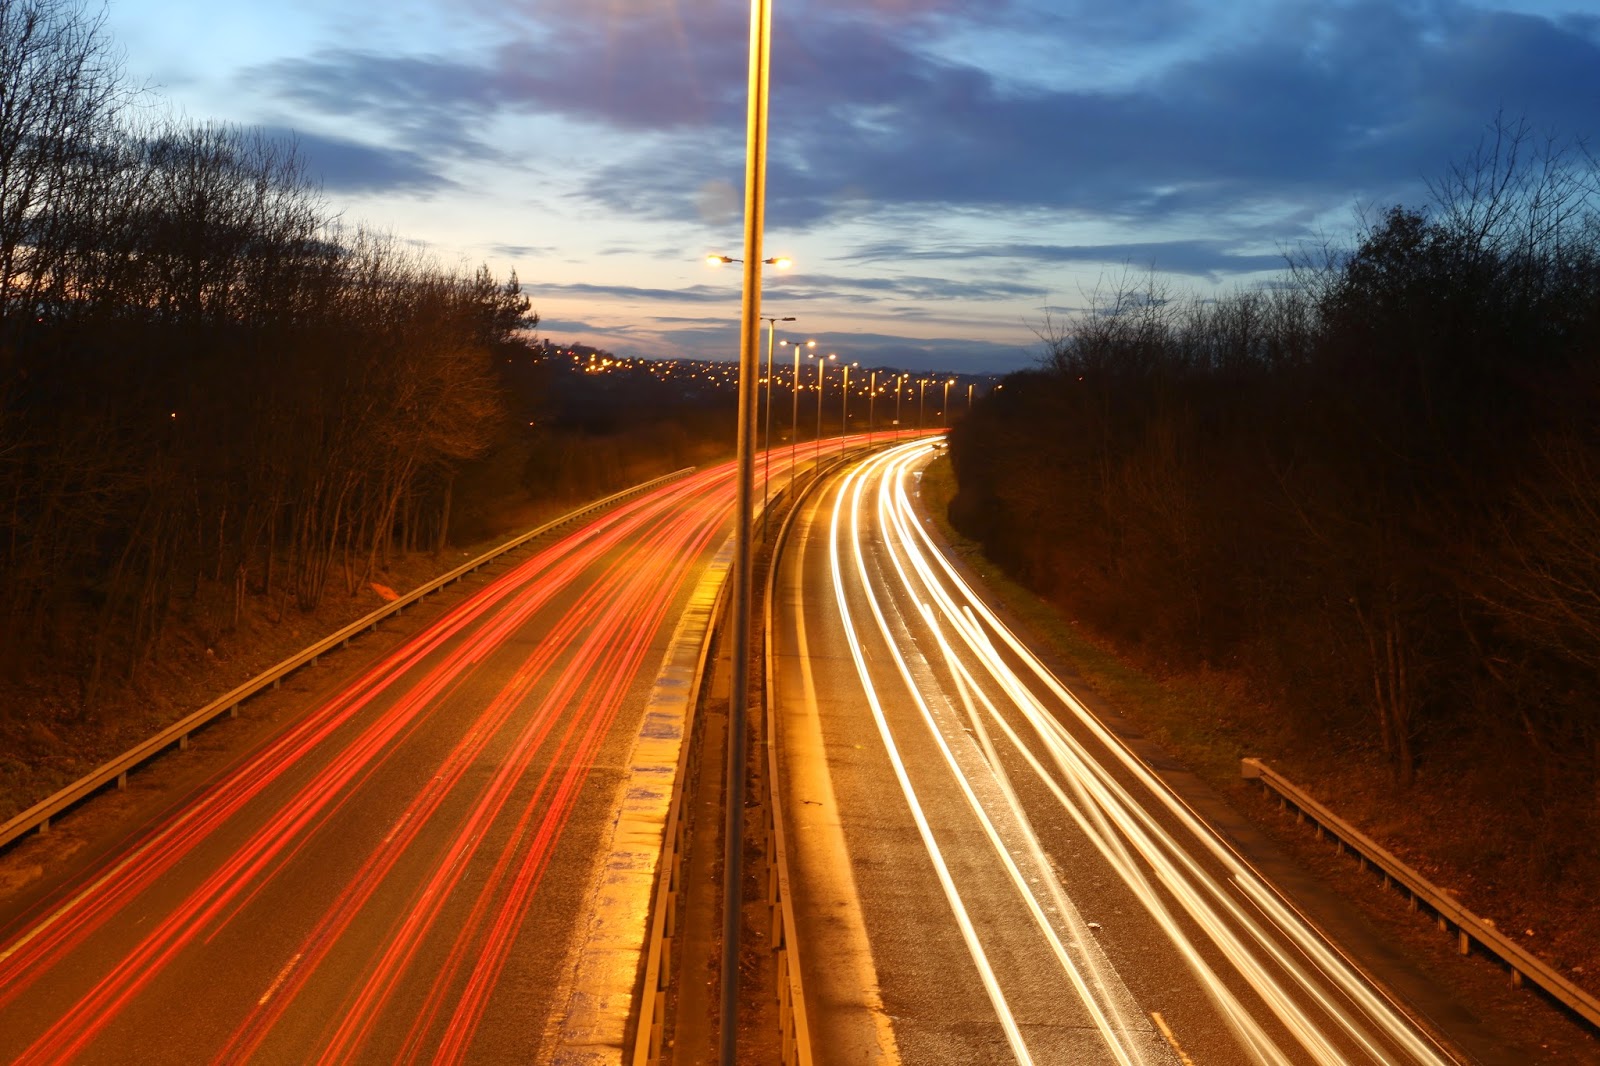
For my ideas in this project I wanted to create three long exposures of cars at night to try and capture the essence of rush hour. I also wanted to create my other three pieces on a similar style to Henri Cartier Bresson but shooting band photography as this is something I am interested in. I wanted to capture three images that were at the ‘perfect’ moment.
For the images of cars at night using long exposure photography, I visited quite a few different locations to shoot my images, until I found three places I liked to shoot my mages. The first places I visited had street lights above the road and I wasn’t too keen on this showing in my final pieces as I thought it distracted attention away from the car lights. Below are the three final images I chose and edited.


I was pleased with how my final pieces turned out as the emphasised the car lights, which is what I set out to do and also I think they capture rush hour like I wanted. However, I think with the images the roundabout one doesn’t look like it fits too much to the set and although I really liked this image I think it would have looked better from a higher angle looking down on the roundabout, but unfortunately this was not possible.
For my three decisive moment images I took photos at gigs of a band I know called Ashestoangels. I wanted my set of three images to work well together and really capture the decisive moment, which is quite hard in itself but even harder when the band are constantly running and moving around and also the low light situations I was working in as well. Below are my three final images.


I am happy with how these images turned out as I think each of them do show the decisive moment well. I cropped them into squares as this helped to show movement and focused the eye more onto the image. I think in hindsight I could have made them either all colour or all black and white, however the others looked better in black and white and the centre image didn’t so I put the colour image in the centre to make it fit more and I think this works as a set of images.


Overall, I really enjoyed this project. I learnt new skills, like how to use the old style film cameras, the 5x4 monorail, the Ricoh KR-10M and the Pentax film camera and I really enjoyed experimenting with these. I also enjoyed developing my own film, even though it was quite hard to do I think it worked out well and working in the darkroom was something else I had never done before so I found this quite interesting and insightful to do. I still prefer shooting in digital though as I like being able to get instant feedback on the images I shoot and also it’s more practical for the type of photography I like to shoot. I think my two sets of images worked out well and given the amount of experimenting and testing ideas done beforehand I think this helped my images turn out much better than if I hadn’t done much experimenting before creating my final pieces.

Zoom Burst and Long exposure Experimentation

Here are some experiments I did with long exposure and zoom burst photography. I think they worked quite well, even though I'm not fond of a zoom burst style of photographs. I liked how the long exposure turned out before it got dark as I like the way the sky looks in the image.


Friday 28 November 2014

Multiple exposures


Taking out a film camera we tried to capture movement in multiple exposure images.

These are a few I enlarged, i think they turned out well and capture movement in them well


Capturing the decisive moment


Using a film camera I went around Chesterfield trying to capture the decisive moment.

These are a couple of the images that I have enlarged, i think they worked out quite well overall however the image of the man and the train came out quite light in the negatives so came out quite grainy when printed larger.


Multiple Exposure in the studio


We used 5x4 monorail Cameras to capture movement in multiple exposures in the studio. 

We had to plan everything beforehand of focusing and getting all the movement and settings right before taking the images.

This was my piece. I think the concept worked well but the image is a little blurry and I'm not sure whether this was an error during the taking or the image or the printing

Wednesday 19 November 2014

Long Exposure Photography

Here are some example of long exposure photographs taken both in and out of college. There are some shorter exposure images too, but all of them capture movement and motion.

At the start of our project we looked into the exposure triangle and these were some experimentation that came out of this. Overall I think they worked quite well.


Sunday 16 November 2014

Life Drawing

During the first stage of the the Foundation course we did Life drawing for three hours a week. Before tis I had never done life drawing before so it was completely new to me. Below are some images of the drawings when I started and then 8 3hour sessions later.

I'm really happy with how far the drawings have progressed. It would have been great to see how much another 8 weeks could have developed my drawings further. I think during the short time the drawings have progressed a lot from the face and hair to the tone being used in the drawings, not to mention the proportions have got a lot more accurate.

From this...


Tuesday 11 November 2014

Us and Them- Final Piece

For the final piece for y project I created a badge that showed my partners identity and personality. The badge looked like a cupcake (because she likes baking) and had many other things incorporated to match her interests and answers to the interviews conducted at the start of the week.

The cupcake was pinks for her favorite colour. The bow because she wears bows and likes bows and the floral design as it is her favourite pattern. Also i used roses (her favourite flowers) to make the cherry (her favourite smell).
Overall i think the piece worked quite well to show personality and identity. Also i think the composition worked well as a badge. However if i were to do this again i would have tried to make it 3-D or tried a larger scale piece, but with the limited time frame i think it worked well.

Wednesday 5 November 2014

Us and Them


What is a portrait?

The definition of a portrait is: portrait is a paintingphotographsculpture, or other artistic representation of a person, in which the face and its expression is predominant, with the intent to display the likeness of the person. Not necessarily a direct likeness, but it could be their personality or through things they like, something that shows that person. 


To begin our new project which was titled Us and Them we first selected a partner and interviewd them to gain greater knowledge about them. After this we took some images, one a normal portrait and the next to try and capture their personality. 


Then later in the day after drawing a few initial line drawings we created a wire drawing of our partner. I think mine worked quite well. I didn't want to make my drawing too detailed so I just emphasised the hair in my piece.


On the second day we made images out of collage to show our partners personality and emphasise certain details. Then in the afternoon we created long paintings collages of different things we noticed about the person. We also created 3-D sculptures of our partner. I created a mask, putting in a bow as she likes bows and doing cat eyes and whiskers to show features of a lion, which was the animal she picked that she would most like to be.